
Contents
Catalog Builder comes with three fulfilment step types that can be used to create your own fulfilment process in a low-code workspace.
It is possible to create new fulfilment step types to extend the fulfilment use cases that can be used to build workflows in Catalog Builder. ServiceNow has documented this process here, but it can be a little hard to follow without an example or screenshots.
Having created a number of fulfilment steps myself, I have written this guide using an example to help the community in extending the functionality of Catalog Builder.
In this example, we will create a new fulfilment step to add an additional comment to the RITM. In an OOB ServiceNow instance, this will trigger a notification to the requestor.
Create a new table
When creating a fulfilment step, the data is stored in a table. We will need to create a new table for our custom step to work with extra inputs. This table is exempt from your custom table count, so no license implications exist.
Start by navigating to System Definition > Tables via the All application menu and select New.
Name the table using the existing naming convention. In this example, I will be calling the table Service Fulfillment Comment Step. Set Extends table to Service Fulfillment Step [sc_service_fulfillment_step] and deselect Create module.
The Columns section should be selected by default. Add new columns to support your configuration on the Table Columns embedded list. In this example, we will add a String field called ‘Comments’ with a Max length of 1024.
Navigate to the Application Access table and ensure Can read, Can create, ‘Can update’ and Can delete are all selected.
Set User role to catalog_builder_editor.
Populate any remaining mandatory fields as required and save the record.

You may wish to add the domain_master attribute to the dictionary collection record if domain separation is in use.
Create a composite record producer
The composite record producer is the configuration behind the form shown when modifying a fulfilment step in the Catalog Builder. The inputs are all stored in the table we just created.

To ensure our composite record producer is configured correctly, it’s best to use an out-of-the-box template. In this example, we will use the Manager approval composite record producer.
Start by navigating to Service Catalog > Catalog Administration > Service Fulfillment Steps Configurations via the All application menu and select the Service Fulfillment Steps – Base step link in the Producer column in the Manager Approval row.
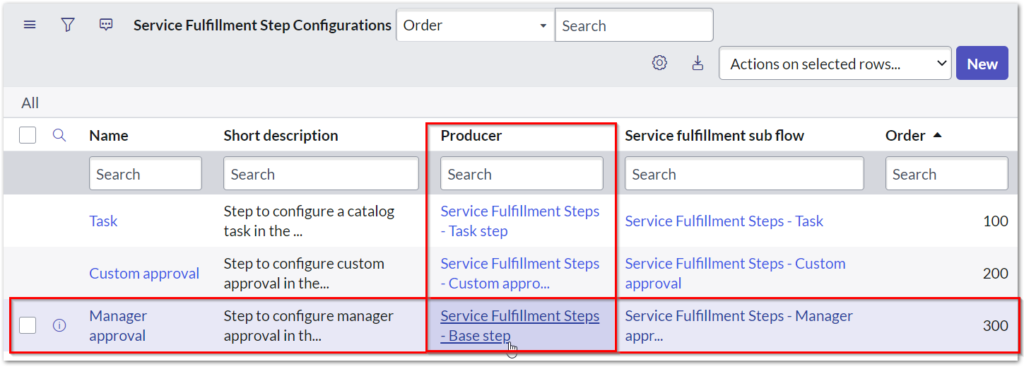
Due to being outside the appropriate scope, the ‘Service Fulfillment Steps – Base step’ record producer will be in read-only mode. Nonetheless, this suits our needs since we don’t intend to alter this record. Firstly, select the Copy option, and as a result, you will be directed to a new record. Subsequently, rename this new record to reflect our ownership, including its short description, and change the table to the custom table we established earlier. Lastly, apply the changes by saving the record.

Now that the form is saved, you need to create a variable for each input in our fulfilment step type. In this example, we will navigate to the Variables related list and select New. Check Map to Field, setting Field to “Comments” and Type to “Multi Line Text”. Check the Mandatory field and populate all remaining mandatory fields. When you are ready, select Submit to save and return to the composite record producer.
You may have noticed that ServiceNow has tried to be too clever and has added the Variable Set Service Fulfillment Steps – Properties set twice. This does not happen if we were to create the record producer from scratch, but that method requires more manual steps to get it working. Navigate to the Variable Sets tab, check the first row, select Actions on selected rows.. and Delete. Confirm deletion to proceed. Please note that removing via Edit will not work!

We are now ready to build the logic of our fulfilment step.
Create a subflow
Continuing the theme from the previous step, we are going to start with a template that we know will work.
Launch the Flow Designer and open the subflow ‘Template: Service Fulfillment Steps’. Navigate to the More Actions menu and select Copy subflow. Rename the flow as desired and select Copy.

We need to use our custom service fulfilment step table. Change the Type of input Service Fulfillment Step to the custom table we created earlier. We use the ‘Service Fulfillment Comment Step’ table in this example.
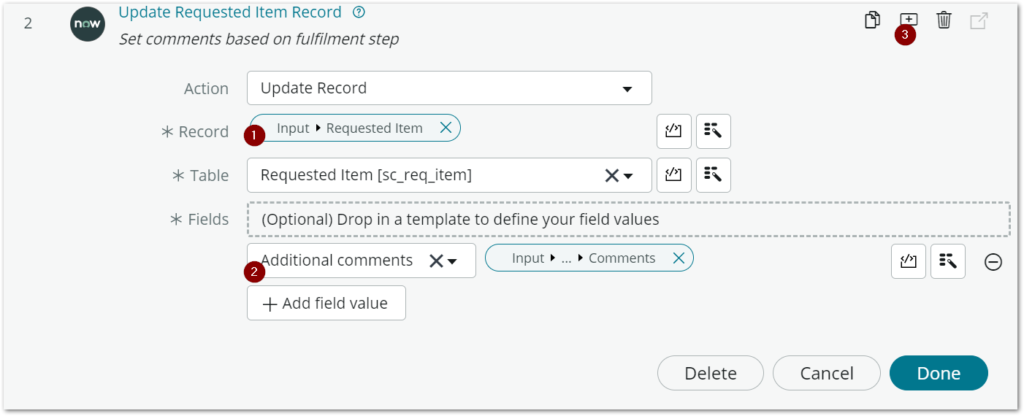
Add an Update Record action to your Subflow. Set record to Input ‘Requested Item’, setting field Additional comments to ‘Service Fulfillment Step’ input Comments field. It’s always a good idea to annotate your action to make it easier to document your work.
We need to let the parent subflow know that our step is complete. Add another Update Record action using the input Service Fulfilment Step Data, setting State to “Complete”.

Update or remove the Log action in Step 1 and publish the flow.

Fulfilment step configuration
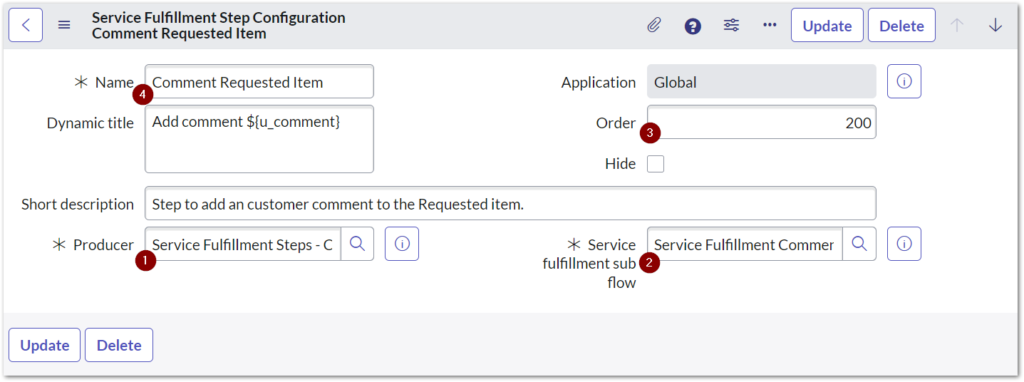
To use our custom fulfillment step, follow these steps: Go to Service Catalog > Catalog Administration > Service Fulfillment Steps Configuration, select New, and populate the Producer field with the previously created composite record producer. Set the Service fulfillment sub flow to the newly published one and ensure that the Order is greater than 200 to display it after the default options. Complete all other mandatory fields and then select Submit. We have tied everything together with these steps, and our custom fulfillment step is now ready to use.
Putting it into practice
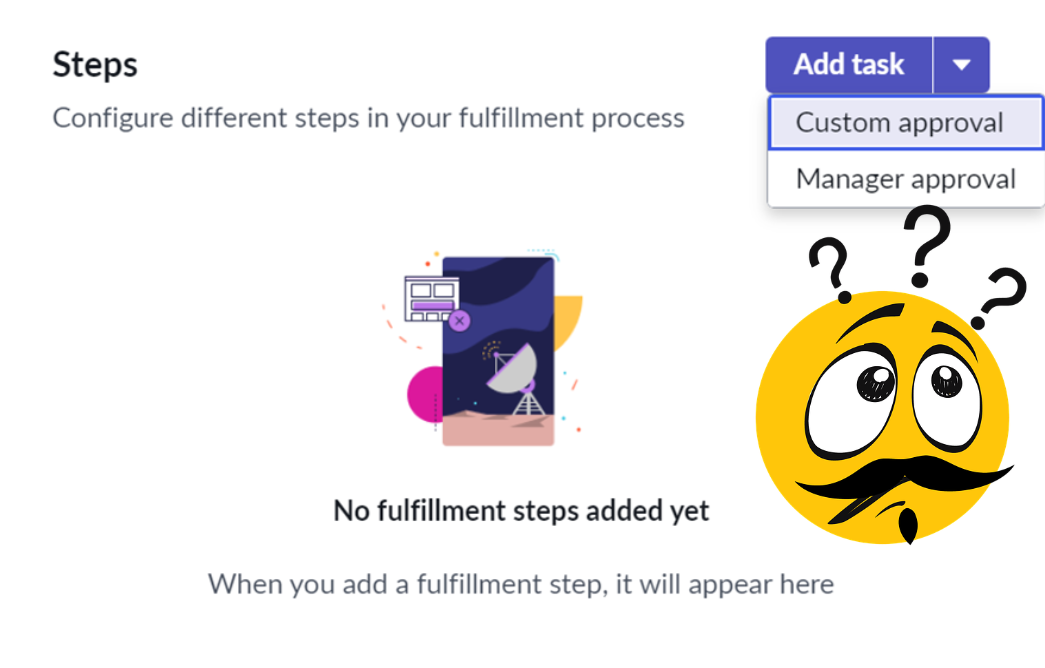
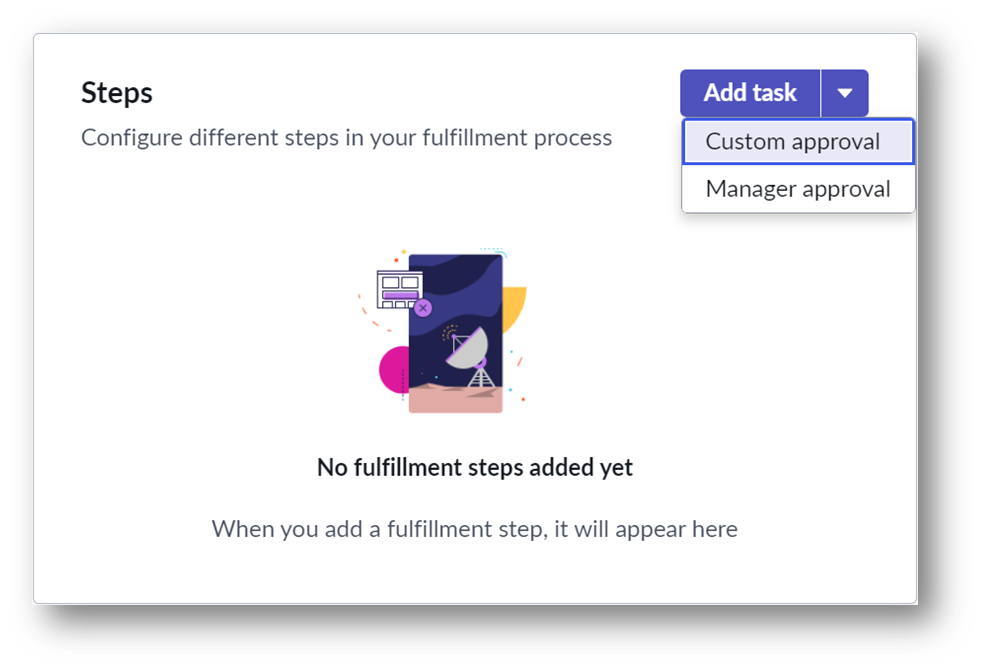
In the Catalog Builder, you should now see an extra fulfilment step in the menu.
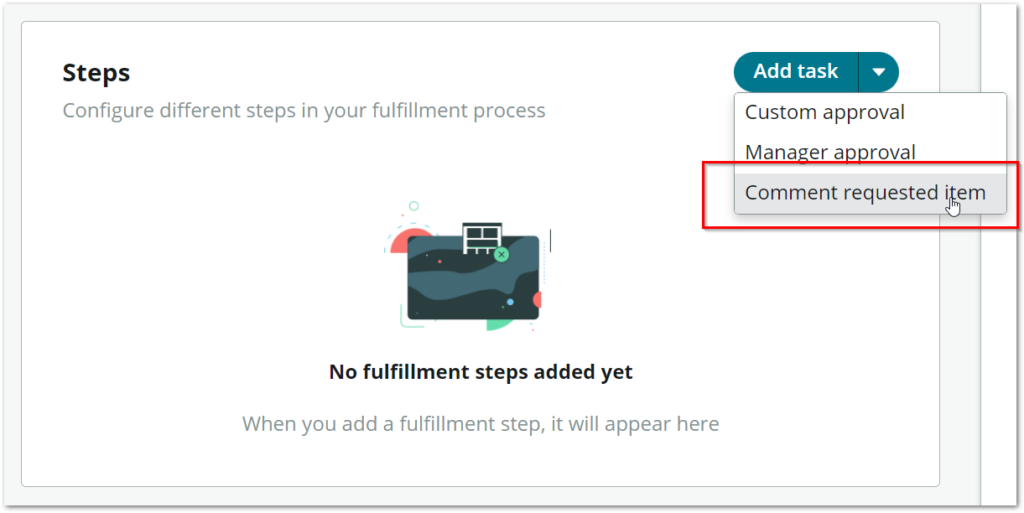
Add the desired input and submit the record.

Publish your item and test it out!

If you had trouble getting this to work, I have uploaded the working example here at ServiceNow Share.
Comment below on the use cases you have extended into Catalog Builder by creating new fulfilment steps!